Showing posts with label tips. Show all posts

Wednesday, May 4, 2011

Benefits The Hybrid Bike

Benefits The Hybrid Bike
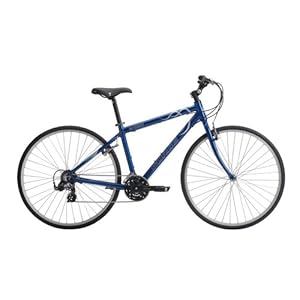
Hybrid Bike By combining the features of a mountain bike and road bike, the hybrid bike is able to utilize the gear system of a mountain bike on urban landscape. The bike's frame is modeled after racing bikes or bikes made for competitions and tours, and its tires are more resilient than a typical bike, in order to accommodate rough urban terrain.

The idea of the hybrid bicycle is to take an efficient bike model, such as the mountain bike, and make it efficient for paved streets and roads. Thus, designers focused on efficiency and comfort, taking the best features of both mountain and road bikes to create the hybrid bike. This bike is ideal for urban dwellers who consider their bikes to be their primary transportation option. The hybrid bike will allow residents to navigate the various street scapes with more ease, thereby making the bike an attractive alternative to cars.

Read more...

The size of bike that fits with your body


The size of bike that fits with your body


Read more...

Monday, December 13, 2010

Types Of Mountain Biking


As a sport or a hobby, mountain biking can be split into 9 different categories. These categories are very versed in what they offer. They are:


1. BMXTypes Of Mountain Biking
BMX is a style where the bikes offer 20 inch wheels. These bikes are commonly used at skate parks or with dirt jumps. Because of their smaller wheels and shorter wheel bases, BMX bikes are much easier to perform tricks and stunts with.

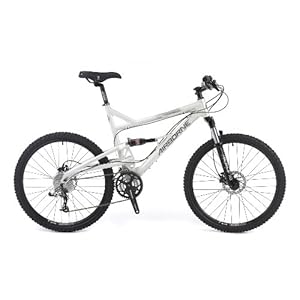
2. Cross countryAirborne Zeppelin Elite Mountain Bike (Cross Country)
This type of mountain biking involves riding your bike up and down hills. Although it's the least
extreme form of mountain biking, most cross country riders are very fit and go on long rides.

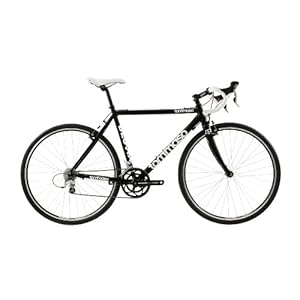
3. Cyclo crossTommaso Bestia Cyclocross Bike
This is a cross between road and mountain biking. These riders have to go over obstacles, cross through rivers, and race on and off the course.

4. Dirt jumpingMongoose Spin BMX Freestyle Bike
Dirt jumping involves jumping the bike over large man made dirt jumps then doing tricks while they are in the air. These jumps are normally close together so riders can go over six or more jumps in one run, gaining a flow to give them more speed for bigger jumps.

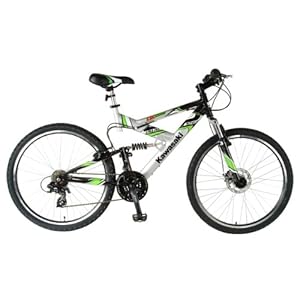
5. DownhillKawasaki DX226FS 26-Inch Dual Suspension Mountain Bike
Downhill mountain biking involves racing downhill as fast as possible. This type of riding is very
intense and extreme, offering riders the chance for ultimate thrills and excitement.

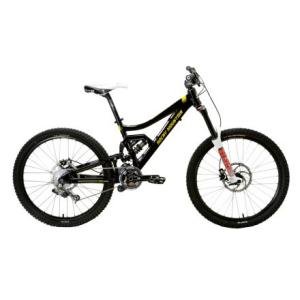
6. FreerideRocky Mountain Slayer SS 396 Bike
Free riding bike involves finding the perfect line down the mountain using all of the terrain to express yourself. These competitions are very popular, as riders can express themselves any way they see fit.

7. Single speedSchwinn Intersection Freewheel Single Speed Road Bike
No to be confused with fixed gears, this is a form of cross country biking that's done using a bike
with only one gear and fewer components. The idea with single speed is simplicity. The straight
chain line will provide efficient pedaling, and the lack of components mean less mechanical problems and a lighter bike.

8. Street and urbanStreet and urban
This type of riding involves riding in urban areas, ledges, and other types of man made obstacles. Riders of street and urban biking will do tricks as well, such as stalls and grinds.
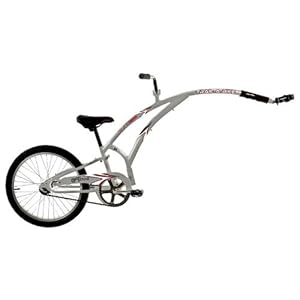
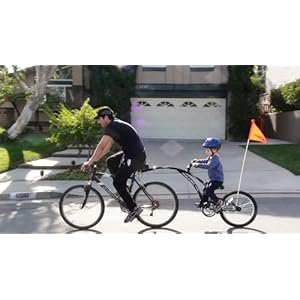
9. TrailsAdams Trail a Bike - Original FolderAdams Trail a Bike - Original Folder
Trials are considered an aspect of mountain biking, although the bikes used look nothing like mountain bikes. They use 20 or 26 inch wheels and sport small, low frames. Trail riders will hop and jump their bikes over obstacles, which requires an extreme amount of balance and concentration.


Read more...

Thinking About Buying A Mountain Bike

Pacific Tuscon Men's Dual-Suspension Mountain Bike

Are you a biking enthusiast? If you are, then you probably know how problematic buying the perfect mountain bike can be. If you are a newbie and wish to buy your very first mountain bike, you have to be prepared for a tough hunt. You should never settle for anything less than satisfactory. If it is anything to go by, you should settle for the best there is in the market. Quality and price do come hand in hand, however, and it is a reality that we all have a specific budget range. But that is of little consequence. There are so many quality mountain bikes that you can afford. It's a matter of looking for the best deals.

First thing to consider when buying a mountain bike is your budget. Do some research on the different price levels of available mountain bikes. You need not go inside every sporting goods store to compare prices. The internet will do just fine, maybe even better, as there are countless of online stores and biking websites from which you may get the information you need. When you have an estimate of how much a mountain bike costs, you can set out and begin looking for the bike that you want. Here's a little tip - try buying from a local community sporting goods or bike shop. The prices are considerably lower than those from mass merchant stores like Wal-Mart.

What is your style? Mountain bikes are manufactured differently from one another. The reason for this is that there are different specifications and requirements on mountain bikes depending on your riding style and the terrain types that you will be conquering. Among the different styles of biking are - smooth riding, cross country racing, mountain cruising, or lift accessed downhill. You need to know which of these styles you will be embarking on. This is very important in finding out the right mountain bike for you. Here's another tip - salespeople are in it for the commission. Don't listen to their tiny voices which say you need to buy this or that bike because they are top of the line. Buy according to your needs and style.

There is another very important point that you need to consider when buying a mountain bike. Full suspension or hard tail? To be honest, a full suspension mountain bike is the best choice. That is, if you can afford it. However you can still choose a hard tail. If you opt for the hard tail, which means the bike has no rear suspension, the bike will be much lighter and pedal more efficiently. Full suspensions are of course the most comfortable. However, since there is a satisfactory alternative in the presence of the hard tail, this decision will be based on what you really want and what your budget is.

Don't forget to take the bike for a test ride. Try testing out several different bikes, so you will be sure which one works best for you and with you. Also, try checking out seasonal sales and promos. This way, you will be able to save some money and afford the best possible mountain bike within your price range.

I hope that this little guide was able to help you. With the tips given, I am sure that you and your new bike will work together for that ultimate mountain biking adventure.


Mountain bike center

Read more...

Thursday, September 16, 2010

How To Get The Best Deal When You Buy A Bike In The UK

In the UK, bikers agree “no one in their right mind would pay list price on a new or secondhand bike.” The advertised price is the beginning of a negotiation, since it may be the seller’s maximum-profit point, but it might not be the buyer’s best deal. So how can you get the best deal on a new or secondhand bike, if you’re planning to buy in the UK? Well, your first task is—hard though this may be to hear—to do your homework. No, not your math homework, your motorcycle homework! Read the classified ads in the local paper go out on the Internet and surf for local dealers, and don’t neglect to ask your friends about deal that they’ve gotten on their bikes.

Now that you’ve done your homework, schedule your exams carefully. The best day to drive the seller’s price is going to be the last day or two of the month. This is the window when most of the people who work in bike sales have a little bit more room for negotiation so that they can hit their dealership’s sales targets. Have you got extra time to maneuver? If that’s the case, wait until winter when the market’s slowest, and you’ll get the best deal on your new bike. When you go into the showroom to negotiate for your bike, start off with the right line. Ask, “What’s the best you can offer me?” and you’ll find that the conversation just flows from there.

Don’t be intimidated by the sales staff; on the contrary, they’re there to help you, and you’re certainly there to help them do their job. Once you’ve started off with the right question, remember that you’ll pay not only the price on which you agree, but that there are hidden costs as well. If you rode your own bike to the showroom, well, you’ll want a good price on it. And if you’re planning to sign on for financing, then keep in mind that the interest rate you pay on the loan will work out as part of the purchase price as well. Sales staff will likely make more money if you buy with a finance plan; so keep that in mind, and you might even be able to use this information to your advantage.

Don’t forget that English law frees the dealer of any obligation to report that the bike’s been damaged in shipping or on the showroom floor, unless you ask directly, so make sure you ask the question—even if it seems unnecessary. Also keep in mind that, for the first six months after your purchase, new consumer legislation requires the dealer to prove that any flaw that develops or becomes apparent in the bike isn’t their fault—even if it’s a used bike, regardless of any warranties. So, check out your current consumer rights before you shop and keep an eye on consumer legislation even after you make a major purchase.

Read more...

Friday, August 27, 2010

Bike Buying Tips

The Right Bike for You

Want to buy a bike but don’t know where to begin? Maybe a friend of yours recommends getting a certain bike, while another biking buddy insists that his bike is the best choice for you. Who do you listen to? How about neither? What you need to do is sit down, relax and figure out what your priorities and preferences are to determine what bike is going to work best for you. Here are some points you will definitely want to consider before you pick out your new set of wheels.

What’s Your Riding Style?

Start by asking yourself why you want to ride to begin with. Is it for exercise? Do you want to fly through the air for the thrill or the sport of it? Where are you going to ride? Through city streets or back road trails? Once you define your style of riding, it will be easier for you to choose the kind of bike you need.

There Are a Variety of Bike Options Available

Although there is a multitude of bike styles, the following are some of the most popular:

Mountain Bikes: These are durable bikes you can take off the road. Mountain bikes have fat tires, comfortably wide handlebars, and low gears for easier navigation of hills.
Road Bikes: If you plan on doing long rides, pavement riding, this is the bike for you. Road bikes are built for speed, have thinner tires and handlebars, and are overall, much lighter in weight.
Hybrid Bikes: This type of bike combines the features of mountain bikes and road bikes. Hybrid bikes are perfect for those who want to experiment with all styles of riding.
Cruisers: These bikes are generally one speed and are constructed for literally just that—cruising.
Comfort Bikes: These are specialty mountain bikes or hybrids that offer more upright riding and softer seats. These bikes are essentially designed for riders who desire more comfort in their ride.

Size Matters

Some bike models offer up to eight different sizes. To determine the right size for you, measure your inseam—this will determine the right size frame, in terms of stand-over-height. Like a pair of jeans, the right fit is important.

Ask Questions

Don’t be afraid to ask advice about what you don’t understand, such as quick release, bike maintenance, what kind of equipment you need, etc. Knowing what you need to know is the difference between easy riding and not so easy riding.

Buy a Bike You Like

Take even the smallest details into consideration when buying a bike: how it rides, size, how it looks, color--everything. After all, it’s your set of wheels--ride it proudly.


Read more...

Bike and Run Adventure Racing on a Budget

Bike and Run Adventure Racing

Gerald Fusil is a man who always puts his ideas into action and others follow. The founder of the Raid Gauloises, The world’s first true expedition race is always on the lookout to expand the sport. The cost of competing in adventure racing has reached a level that few teams can now afford. Organisers and adventure racers are faced with high travel and insurance costs. One way to attract racers is to offer large sums in prize money, and top teams can make a living, but what about the average racer.

Last Year, During the annual Reunion D’Aventures race, Gerard Fusil added a bike and run discipline which required the four person team to share two mountain bikes during a couple of legs of the race. The trial was a success as teams were forced to think of tactics to complete the legs in the fastest possible way. Some teams doubled up on the downhill sections, others stayed, whilst the more successful set up a relay system with the rider going a set distance before leaving the bike at the edge of the track for their team mate, who would get on and then leapfrog them.

Gerard Fusil saw an opportunity to return once again to the basis of Expedition Adventure Racing. Providing teams the chance to explore a country, interface with the local population and race in exotic locations with out the need to transport large amounts of gear. Gerard Fusil announced his ideas at the Reunion D’Aventures prize giving and the world waited with bated breadth.

September 2005 saw Gerard Fusil Launch the Bike and Run Concept to the World with the Oman Adventure. Details were brief, two person teams to share one bike with only one person to be on the bike at one time. The race would be run in a number of stages including a night stage and teams had to be prepared to camp in the wild. Time was short so Gerard Fusil used the course notes from the 1992 Raid Gauloises for parts of the course.

Gerald Fusil made one other departure from the norm by pre-announcing the lengths of each stay and the names of the overnight camps. The race was to take place on the East Coast of Oman, however some of the place names were only known to the locals.

December 2005. A barmy evening camped by the sea saw Gerard Fusil briefing the gathered teams from France, Oman, UK, Réunion, Austria, Holland and Australia. Most teams had arrived in the morning so had little time to prepare. Support vehicles were shared by two teams, so competitors spent the night poring over maps and packing gear into the vehicles by torchlight.

The following day at dawn a convoy of vehicles transported the team to the start line in a nearby Wadi. The first day included a section of running only along goat tracks and this proved to be decisive as the Australian and one local Omani team got lost allowing a French team to build an unassailable lead.

Later in the week Gerard Fusil had mapped out the course with a 17k twisting climb from the sea to 1500 metres and also a section of canyoning with a number of swims.

Gerard Fusil had arranged camping or bivouacs in a number of scenic areas, with the stages starting in the early morning most teams would finish around mid-day or early afternoon.

The terrain in Oman is varied from lush oasis to harsh rocky hillsides and of course seas of sandiness where the teams finished the race. Gerard Fusil held the prize giving in Muscat the winners being a husband and wife team Wilsa Sport Helly Hansen from France. Second place went to the Australians and a Local Omani team came in third.

Teams came from many different backgrounds, Adventure racers, tri-athletes, marathon runners, mountain bikers; the final count saw adventure racers however leading the way.

Virtually all teams adopted the general tactic of leap frogging, however there were at least a couple of incidents when teams missed the bike, including one on the long climb for an all female team which required an extra 4k to be covered to collect the bike!

The Inaugural race proved to be a success and now Gerald Fusil has announced the second race of the series which will return to a different area of Oman at the end of November.
.


Read more...

Thursday, August 26, 2010

Bicycles For All Ages- What You Should Think Over While Shopping!

Biking is fun for everyone! Not only is it a wonderful way to get around, it provides you with your daily dosage of exertion and activity as well. So while bicycles have principally been a means of transport for a long time now, that is no longer the case. Bikes keep you fit. Bikes can add adventure to your dat. Bicycles also keep the surroundings cleaner. And for the more self righteous ones - bikes make you feel like you are doing the world a favour!

What to look at:
So you've decided to buy a bicycle, now the first thing you've got ask yourself is:
* Who's going to be using it?
* What it will be used for?
* How much are you willing to spend on it?
Your reason for buying a bike

Among many bike lovers, while most choose to bike casually, either to school, university or even work; some more adventurous ones have also been a part of stunt biking groups, professional biking clubs or mountain biking associations. Biking is a great hobby and with so many options to choose from, you can decide how best you associate with this great invention! However, before you jump to any of that, you do need a bike. Here are a few tips to keep in mind when purchasing a bike either for your kids or for yourself.

Purchasing a bike for your toddler

So you've decided to initiate your toddler to the wonderful world of cycling; now the right time to get your toddler a two wheel bike is when they have reached age 3. By this age, kids have properly developed motor skills as well as a sense of balance and self sufficiency. Buying a bike for your child requires some research. Just knowing the brand and the colour preference is not enough. The bike needs to be comfortable enough for the child to ride, especially if the child is starting out learning to ride a bike.

The details

Bike sizes are classified via the size of the wheel. There are recommended wheel sizes for all age groups. When purchasing a bike for your child, pick the bike with the correct wheel size of 12 or 14 inches. Take your child with you for bike shopping. Make sure her legs reach the floor. When riding a bike, this will give the child more self confidence. Also make sure you purchase a pair of detachable side wheels for training her so she can learn to balance. Another important thing to keep in mind is to purchase a bike that is light in weight. Since you toddler is learning to ride, chances are she might fall a few times. And a heavy bike will worsen the experience. So while it is a bit more expensive, it is worth the investment. And while you are at it, don’t forget to purchase a bike helmet!

Bikes for kids in their pre-teens and teens

By the time your kids are in pre-teens or in their teens, they will have mastered the art of riding a bike and would have long outgrown the toddler bike. Now is the time for something different! Since they are a bit grown up, they will want more say in the purchase decision. It is best to get to know what it is they are looking for. Now, remember, kids might want the world, but you are working with a budget. So make sure your child is aware of it before hand so he can do his bit of research as well within that budget.

Ergonomics

In this age group, most kids will use the bike to go to school and for after school activities like meeting friends, taking part in local racing competitions etc. Consider the ergonomics of the bicycle. Make sure the handle bars are not too close to the seat as it will exhaust your child quite easily. And ensure that the seats are comfortable. The ideal wheel size for a pre-teenager’s bike is 18-22 inches. Make sure bikes for your young teen have coaster breaks for additional safety. Teenagers can use the same bike size used by adults, which is a standard 24 inches. Take your children with you so they can test ride the bikes before finally choosing one which fits their requirements and your budget. Also, don’t forget to accessorize. Items like extra headlights, water-bottle, reflectors, mirrors, radio etc. will personalize the bike for your child.

Considerations when purchasing a bike for adults

The ideal bike size for adults is 24 inches. When purchasing such a bike, ask yourself a couple of basic questions. Is the bike for casual riding or exercising or for a special hobby like mountain biking or for sports? You can opt for a single gear or multi-gear bike giving you the convenience of varying speed limits, based on where you are riding it. These days road bikes offer speed ranges of 12 to 21, to choose from. Another important thing to look for is adjustable seats and handle-bars.

Before you make a final purchase, test ride a couple of bikes since unlike kids, you are not likely to outgrow the bike you purchase. This also means you should go for something that is not just sturdy but also light.

Today, there are different brands with various models of bikes catering to all these specific requirements. Based on your requirement, choose the right bike for your needs.

Read more...

Beginner Triathlete

Beginner Triathlete

In preparing to take on the challenge of a first Ironman, I believe far too many athletes put too much emphasis on the bike they choose to purchase for the event.

Somewhere along the Ironman trail, many athletes have come to believe that the lighter, and more state of the art the bike, the faster they will finish the bike leg of the Ironman.

Nothing could be further from the truth. For example: You could put one athlete on a $10,000 bike and have him train without the aid of a proper diet or without paying attention to proper hydration choices and repacement drinks and the Ironman will spit him out like a cherry pit somewhere around mile 80 on the bike course.

Take another athlete and put him on a $800 reliable, average weight, used bike fitted with proper pedals and aero bars. Then have him pay particular attention all training year to proper diet, hydration, and raceday fueling techniques and somewhere around mile 80 of the same course he will call out "nice bike" as he passes athlete number one who is in for a very long, painful day.

Don't get all wrapped up in taking out a second mortgage so you can buy that "special" bike that is 6 ounces lighter than anything on the road. After all, you're going to be loading 5 pounds of water and food and gear on the thing before you even get out of transition. This is not your normal bike race. If you were just racing a bike century and that's it, then that might be a different story. But that's not the nature of this beast.

First of all you've most likely been bashed around for an hour or so in a wild free-for-all swim and for most of that time your heart-rate has been racing out of control. Plus, you still have a full marathon to consider after you get off the bike.

Your bike is just a small part of the Ironman equation. Don't get too wrapped up in light and fancy and expensive. I know, I've done that.

I had my best bike leg ever and my first thought was to fix up the old bike and keep racing it. However, I let my bike supplier talk me into buying a fancier, newer model that was so much lighter that I would go even faster. I never, never matched my fastest bike ride over the next 10 years. Even on bikes valued 10 times more than my old standby. It was probably the biggest single mistake I made in my 20 year Ironman career. I should have gone with my very first instinct.

For some reason, a bike will just suit you. It suits your style, ability and "fits" you like that favorite pair of runners. When this happens, hang on to that bike. If you have to, save it mainly for races and get a second bike for the bulk of your training. That way your race-day bike will last you for years.

I've raced on more than one high-end bike that I was just never comfortable on, no matter how light and fast they were supposed to be. At first it may seem cool to be the recipient of envious gazes from fellow triathletes when they see you on your bike the week leading up to the race. You are the bike "king".

Believe me, its not so cool when these same athletes pass you out on the course with those dreaded words left in their wake. "Nice bike."

Every time you hear that, you will want to sink further and further into your bike seat. You will wish you were on a $250 beater. At least that way you reason, you would have an excuse for getting passed over and over again. There is nowhere to hide out there.

To save yourself a ton of embarrasment and humiliation, be sure that your ability matches the bike you ride.

All my bikes are gone now, except for one. That same old bike is in my living room on a wind-trainer and if I decide to do this amazing race once again, when I turn 60, four years from now--it will be on a very special, 16 year old bike.

Read more...

Sunday, August 22, 2010

Spring Tune Up Tips

Spring Tune Up Tips - bike accessories, Exercise Bike, Mountain Bike, Hybrid Bike, Folding Bicycle, BMX Bike, tips,


If you don't ride in the winter, you've probably spent the winter months on the couch eating chips and watching television. Before you know it, spring will be here and a new season of mountain biking will begin. Even though your body may not be in shape, these tips will ensure that your bike is.

Before you take your bike out, check the wear and tear on your components and adjust them if its necessary. Start off with your chain. If you haven't replaced it in a year or more, it's time to do so. Over time, the individual parts in the chain will get worn out, increasing its effective length.

As this happens, the chain is no longer able to conform to the cog and the teeth of the chain ring, so it wears those teeth out to fit the profile of the chain. If you can replace the chain before it stretches too much you'll save yourself from having to replace high priced cogs and chain rings.

Now, check the bearing surfaces. These include your bottom bracket, hubs, and the headset. Each of these should turn without a problem with no play in the system. Before checking the bottom bracket, make sure each cranking arm is snugged tight. Next, hold on to the crank arm (not the pedal) and wobble it back and forth. If you hear any clicking or if the crank arm binds, the bottom bracket needs to be adjusted.

Do the exact same thing with your hubs. Take the wheels off the bike, spin the hub axles, then feel for any free play or binding. If you feel play or binding, you need to make an adjustment. To check the headset, start off by putting the newly adjusted wheels back on the bike.

Now, grab the front brake and pull and push the handle bars back and forth. There shouldn't be any play. If you lift the front end off the ground, the fork should turn very smoothly. If it feels rough, it needs to be either adjusted or replaced.

While your looking, check the condition of your cables and housing. The cables should be rust free and the housing shouldn't be cracked or kinked. If you see any of this you should replace the offending device, as if you don't your shifting and braking will be sluggish.

Last, you should inspect your brake pads. Most pads will have ridges or indicator marks that will let you know when they need to be replaced. Brake pads that are worn out will comprimise both safety and braking efficiency.

Once you've got the tune ups out of the way, it's time to go for a ride. With your mountain bike running better than ever, all you have to do now is have fun!

Read more...

How To Lube Your Mountain Bike

Mountain Bike -  Lube Your Mountain Bike

A mountain bike is a lot of fun although it does require some maintenance. You should always lube your bike 15 hours or so before riding, as quick jobs right before you take off normally doesn't get everything lubed. Some lube jobs will last for more rides, although if things get loud or shifting gets sticky, it's time to lube.

Here is how to lube your bike:

1. The chain
Apply a generous amount of mountain bike lube to your chain as you move the pedals around backwards. It also helps to find a spot to steady your hand such as the frame while you move the pedals around and around. Make sure you watch out for the cranks and chain rings as they move around.

2. Front Deraileur On the front defaileur, lube the pivots. Use a spot of lube everywhere you can see movement when you move the shift lever.

3. Rear deraileur
Just like the front deraileur, lube the pivots.

4. Pedals
There are some types of clipless pedals that will need to have the release mechanism lubed. You
should only lube this mechanism if you have this type of pedal.

5. Everything into motion
Pedal around, shift your gears, and bounce your bike around. If you hear anything squeak, there's a moving part there are it should be lubed immediately.

6. Wipe it all clean
Once you've lubed everything and wiped it all around, simply wipe it all back off. Use a rag to wipe away all the lube you used, including all the lube off the chain. Wiping it away will leave the lube in between the parts but clean it away from everywhere it isn't needed. This will keep your bike from collecting dirt while you ride.

Read more...

Tuesday, August 17, 2010

How Mountain Bike Gears Work

Mountain Bike - TOP kick Dual SuspensionThe gears in mountain bikes just keep getting more and more intricate. The bikes of today have as many as 27 gear ratios. A mountain bike will use a combination of three different sized sprockets in front and nine in the back to produce gear ratios.

The idea behind all these gears is to allow the rider to crank the pedals at a constant pace no matter what kind of slope the bike is on. You can understand this better by picturing a bike with just a single gear. Each time you rotate the pedals one turn, the rear wheel would rotate one turn as well (1:1 gear ratio).

If the rear wheel is 26 inches in diameter, then with 1:1 gearing, one full twist on the pedals would result in the wheel covering 81.6 inches of ground. If you are pedaling at a speed of 50 RPM,this means that the bike can cover over 340 feet of ground per minute. This is only 3.8 MPH, which is the equivalence of walking speed. This is ideal for climbing a steep hill, although bad for ground or going downhill.
To go faster you'll need a different ratio. To ride downhill at 25 MPH with a 50 RPM cadence at the pedals, you'll need a 5.6:1 gear ratio. A bike with a lot of gears will give you a large number
of increments between a 1:1 gear ratio and a 6.5:1 gear ratio so that you can always pedal at 50 RPM, no matter how fast you are actually going. On a normal 27 speed mountain bike, six of the gear ratios are so close to each other that you can't notice any difference between them.

With actual use, bike riders tend to choose a front sprocket suitable for the slope they are riding on and stick with it, although the front sprocket can be difficult to shift under heavy load. It's much easier to shit between the gears on the rear.

If you are cranking up a hill, it's best to choose the smallest sprocket on the front then shift between the nine gears available on the rear. The more speeds you have on the back sprocket, the bigger advantage you'll have. All in all, gears are very important to mountain bikes as they dictate your overall speed. Without gears you wouldn't be able to build speed nor would you be able to pound pedals. The gears will move the pedals and help you build up speed.

There are all types of gears available in mountain bikes, all of which will help you build up a lot of momentum if you use them the right way.

Read more...

Thursday, August 12, 2010

Mountain Biking Vacation

Taking a mountain biking vacation is an excellent way to unwind and explore America. There are several companies that offer mountain biking tours that go through scenic routes, and they often arrange any accomodations for travelers as well. For athletic couples, these Mountain Biking types of vacations offer the perfect way to relax and enjoy some exercise together.

Each and every region in the United States has some truly awesome mountain biking trails. It's not just the major mountain ranges that offer these trails, as any hilly, scenic, rough trail can provide riders with the adventure they seek. Some of the best areas to mountain bike ride in the United States are the Pacific Northwest, Southwest, and Southeast states such as North Carolina.

Even though the entire American West area is great for a mountain biking vacation, the Southwest area is rapidly becoming a popular area for the sport as well. In the Southwest, some of the best trails include Pinery Canyon Road in Arizona, South Boundary Trail in New Mexico, and Flume Trail in Nevada.

Each and every trail deserves it's reputation as a tough ride. Each one of these trails is over 20 miles in length, with Pinery Canyon being the longest, at over 50 miles! Keep in mind though, just because you go to a trail it doesn't mean you have to ride the entire length.

The Pacific Northwest is also a great place for a mountain biking vacation. The three best trails in the entire region are Surveyor's Ridge in Oregon, Mount Tamalpais in California, and the Methow Trial System in Washington.

A mountain biking vacation is perfect for athletic people who have the desire to explore regions at their own pace. These Mountain Biking trips are much less expensive than other trips, yet they can easily be the adventure of a lifetime.

Read more...

Mountain Biking Safety Tips

Mountain Biking Safety Tips


There are numerous ways that you can improve your mountain bike safety. Many riders will tell you that wearing a helmet is the most important step to staying safe. The second most important step is that you should always ride in control of your mountain bike.

By riding in control you'll not only prevent crashes, but keep others on the trail safe as well. When riding out of control you loose the ability to adjust to the terrain as you ride over it. This can and usually does result in serious injury to yourself and others.

Follow these helpful guidelines and you'll remain safe when riding your mountain bike.

Gear
Always make sure that you wear a helmet and other necessary safety gear for the conditions that you plan to ride in.

Never ride beyond your control
There is never any shame in walking the areas of the trail that you don't feel comfortable in riding and you should never let anyone else tell you that there is.

Keep your speed under control
Always make sure you keep your speed at a level where you can quickly adjust to any obstacles or change in the trail.

Knowing your trail
You should never push the limits on trails that you aren't familiar with. You should take trails you aren't familiar with at slow speeds until you learn them better.

Slow down around blind corners If you can't see past a corner you should always slow down, as you never know who or what is around it.
Start small then go big
Work your way up to stunts or obstacles. Practice in less difficult or dangerous situations before you move up to something more dangerous.

Playing it smart
If you start to question what your doing, you probably shouldn't be doing. Always think about what you are doing and go with your instincts.

Read more...

The History Of Mountain Biking

The History Of Mountain Biking

There is a lot of history and information out there in regards to the history and origins of mountain biking, with some being recognized and some that depends on who has the best firm of public relations.

Some say that mountain biking began with the Buffalo Soldiers, which was a turn of the century infantry who customized bikes to carry gear over the rough and tough terrain. They began in August of 1896, over the course of 800 miles. Their mission was simple -to test bikes for military use in the toughest of terrain. Others say it was the Velo Cross Club of France that started mountain biking. The club was comprised of 20 young bikers from Paris, who between 1951 and 1956 developed a sport that resembles present day mountain biking.

It could have also been John Finley Scott, who was the first mountain biker in the U.S. In 1953 he constructed what he called a "Woodsie Bike", using a diamond frame, balloon tires, flat handle bars, and cantilever brakes. He was more than 20 years ahead of his time. Even though he remained an off road enthusiast, there were many at that time who didn't share that same passion. Today, we believe that the history of the mountain bike is most apparent in Northern California. There are a few areas that claim to be the first community for mountain biking, although each and every history book will tell you Marin County.

The sport of mountain biking has taken many twists and turns over the last several hundred years. Even though there are many that say different things about the history and the beginning, we know one thing for sure - one thing has led to another and the sport of mountain biking was born.

Read more...

Tuesday, August 10, 2010

Bicycle Brakes

Remember when you were a kid, and you first dared to ride your bike down that really steep hill in your neighbourhood? The ride down can be a rush. Stopping isn't always so much fun. Bicycle control relies on two elements: steering and brakes. If either of these is missing, you are an out of control cyclist, hazardous to yourself and others.

History's first bicycles had no brakes. Band-aids hadn't yet been invented, so the next logical step was to devise a stopping system. Thus, brakes were born to help riders slow down and stop, and bicycles suddenly became more popular. By increasing frictional force on the wheels, cyclists were able to slow down and stop.

The first widely used braking system was called "the plunger". It first appeared on the high-wheeled bicycles that were popular in the 1800s. The plunger operated on a simple principle. To slow down a bicycle, a lever was either pressed down or pulled up, causing a metal show to press against the outer side of the tire. Of course, the friction created caused excess wear and tear on the tire. Cyclists found that the plunger did not work well with pneumatic tires, even after covering the metal shoe with rubber. Wet surfaces were another drawback, as water decreased the friction between the brake shoe and tire, reducing the braking power.

The next major development in bicycle brakes was the "coaster brake". Most of us have used coaster brakes, still popular in pint-size toddler bikes and tricycles. Some utility bicycles and cruisers also use coaster brakes. The concept behind coaster brakes is simple reverse motion. When the pedals are moved in a reverse direction, the brake mechanism inside the hub of the wheel pushes outward, creating friction and slowing down the bike. Coaster brakes are quite strong and tend to lock up and skid the rear wheel when engaged, so they're great choices for sidewalk burnouts.

Most of today's mountain, road and stunt bikes use caliper rim brakes. By pulling a lever, a cable is tightened. This cable then forces the brake pads or shoes to press against the inner rim of the wheel, stopping the bike. Caliper bicycle brakes are light and relatively inexpensive, but they do come with their own set of problems. Not hugely efficient on rainy days, wet brakes take twice as long to stop a bicycle because the water reduces friction between the brake and the wheel. Caliper brakes work best when pressure is applied gently.

It is important to balance the braking between the front and rear brakes while riding. If too much brake pressure is applied to the front wheel, your momentum and body inertia will take you right over the handlebars.

Over the decades, braking systems and materials have changed, but the fundamentals of slowing and stopping a bicycle have not. Bicycle brakes are still based on the concept of friction, and are still vitally important to your safety.

Read more...

Bicycle Accessories That Make Riding Easier

When you browse around a bike shop, it is easy to get caught up in all of the accessories there are to buy. Some you can easily brush off and find no need for, however, even casual bike riders should consider purchasing various bicycling accessories to make their riding much more comfortable. You don't need any accessories to ride a bike (accept for a helmet for safety), however, I realized after starting back to riding that specific items are now a necessity for myself.

The first thing I purchased for my bicycle was a well-cushioned comfort seat. You can find various types in a bike shop including ones that you can pull over your regular seat. I prefer buying a whole new seat rather than to cover up an uncomfortable one. If you ride for exercise or just for fun, a good padded seat will allow you to ride for much longer periods of time. You can install a new seat yourself or have the bike shop do it for you. Seats are one of the many bicycle parts that are easy to self install.

Another accessory update that helps are pedals with teeth. Most new bicycles come with stock pedals that offer no real grip. These types of pedals are made of solid steel and have teeth or claws that provide a strong grip for the soles of your shoes. These types of pedals can prevent your feet from slipping off of the pedals which can cause an accident.

If you do any type of night riding, it would be wise to invest in a quality headlight. I learned not to go too cheap on a bicycle light because the cheaper models barely light up enough for you to see what is ahead of you. A good high beam bicycle light will provide tons of light to see the road ahead as well as alert any oncoming traffic. The better quality lights usually require a battery pack that are rechargeable. The same goes for having a back light. These are not as expensive but are a good idea to have as the more light you have the less chance of cars not seeing you.

One accessory that you may not consider is the bicycle bell. I was one of those people who laughed at the thought of having a bell on my bike. A bell makes it much easier to warn people ahead of you to make way because you are coming through. This helps a lot when you are on a bike trail. Some bike trails also have people walking on them. Rather than yelling out "on your left" or "on your right", you can simply ring your bell a few times and people will move to the side. This also works great when passing up other bike riders who may not hear you yell out.

Other accessories that add to comfort are bicycle gloves and bottle attachment. Padded gloves will save your hands from calluses and a bottle attachment makes carrying water or a sports drink much easier. Next time you are browsing bicycle accessories, you may want to ask yourself if a particular item could make your riding experience much more comfortable as well as safer.

Read more...

Don't Expect Bike Magic

Expect Bike Magic

In preparing to take on the challenge of a first Ironman, I believe far too many athletes put too much emphasis on the bike they choose to purchase for the event.

Somewhere along the Ironman trail, many athletes have come to believe that the lighter, and more state of the art the bike, the faster they will finish the bike leg of the Ironman.

Nothing could be further from the truth. For example: You could put one athlete on a $10,000 bike and have him train without the aid of a proper diet or without paying attention to proper hydration choices and repacement drinks and the Ironman will spit him out like a cherry pit somewhere around mile 80 on the bike course.

Take another athlete and put him on a $800 reliable, average weight, used bike fitted with proper pedals and aero bars. Then have him pay particular attention all training year to proper diet, hydration, and raceday fueling techniques and somewhere around mile 80 of the same course he will call out "nice bike" as he passes athlete number one who is in for a very long, painful day.

Don't get all wrapped up in taking out a second mortgage so you can buy that "special" bike that is 6 ounces lighter than anything on the road. After all, you're going to be loading 5 pounds of water and food and gear on the thing before you even get out of transition. This is not your normal bike race. If you were just racing a bike century and that's it, then that might be a different story. But that's not the nature of this beast.

First of all you've most likely been bashed around for an hour or so in a wild free-for-all swim and for most of that time your heart-rate has been racing out of control. Plus, you still have a full marathon to consider after you get off the bike.

Your bike is just a small part of the Ironman equation. Don't get too wrapped up in light and fancy and expensive. I know, I've done that.

I had my best bike leg ever and my first thought was to fix up the old bike and keep racing it. However, I let my bike supplier talk me into buying a fancier, newer model that was so much lighter that I would go even faster. I never, never matched my fastest bike ride over the next 10 years. Even on bikes valued 10 times more than my old standby. It was probably the biggest single mistake I made in my 20 year Ironman career. I should have gone with my very first instinct.

For some reason, a bike will just suit you. It suits your style, ability and "fits" you like that favorite pair of runners. When this happens, hang on to that bike. If you have to, save it mainly for races and get a second bike for the bulk of your training. That way your race-day bike will last you for years.

I've raced on more than one high-end bike that I was just never comfortable on, no matter how light and fast they were supposed to be. At first it may seem cool to be the recipient of envious gazes from fellow triathletes when they see you on your bike the week leading up to the race. You are the bike "king".

Believe me, its not so cool when these same athletes pass you out on the course with those dreaded words left in their wake. "Nice bike."

Every time you hear that, you will want to sink further and further into your bike seat. You will wish you were on a $250 beater. At least that way you reason, you would have an excuse for getting passed over and over again. There is nowhere to hide out there.

To save yourself a ton of embarrasment and humiliation, be sure that your ability matches the bike you ride.

All my bikes are gone now, except for one. That same old bike is in my living room on a wind-trainer and if I decide to do this amazing race once again, when I turn 60, four years from now--it will be on a very special, 16 year old bike.

Read more...

Beginner Mountain Bike Skills

Mountain bikingMountain biking is an exciting sport that can be enjoyed by anyone who knows how to ride a bike. Compared to the average bike ride, it does present some danger. Therefore, you should master these basic skills before you hit the trails or the dirt.

You can practice these beginning skills at a local park, school, bike path, or simply around your house. If you can, try to find a location with a steep hill.

Get a feel for your pedals Practice moving your foot away from the pedal, first while sitting on your bike with one foot on the ground. Next, move on to releasing and replacing your foot while pedaling around for a bit. Those with toe clip and clipless type foot pedals will want to spend a bit more time practicing.

Sit and spin for position Simply sit on your bike and pedal around. You should keep your arms slightly bent. You should also adjust your seat height so your leg is 70 to 90 percent extended at the bottom of every stroke on the pedal. Keep your body relaxed, as there will never be a position where you should have either your knees or your elbows locked.

Shifting gears
Get a feel for shifting gears with your bike. The higher gears are harder to pedal and will go faster while the lower gears are easier to pedal and will help you ascend hills. As you get to steeper hills, its best to shift before you get to the hill rather than while your on it.
Coasting
You should spend a bit of time coasting while standing on your pedals, without actually sitting on the seat. Keep your arms bent but don't lock your knees. Now, try experimenting with shifting
your body towards the rear end of the bike.

Pedal while standing


You should get as comfortable as you can with pedaling while standing on your bike. Try lifting
yourself off the seat while standing on the pedals,then crank them around. You should try this in higher gears on flat ground then again in lower gears while on a hill.

Dropping down a curb
Try finding a curb where you can easily get to the upper portion of it. Practice at a moderate speed, standing and coasting right off the curb from the upper level to the lower level. Try this at different speeds until it becomes second nature.

Once you practice these techniques and get the hang of them, you'll be able to hit the trails feeling comfortable on your mountain bike. Even though it may take some getting used to, it'll become second nature before you know it.

Read more...

Mountain Bike Crash

Mountain Bike

There is no shortage of videos of mountain bike crashes from around the world, with many riders with appropriate safety equipment escaping serious injury, while others were not that fortunate. However, some of the most spectacular mountain bike crashes have been staged for television shows and movies, using stunt riders.

In real life mountain bike crashes can be exceptionally dangerous, causing serious injury to the riders as well as any spectators who happen to be in the way. Riders have been impaled on handlebars and pedals as well as having severe leg injuries from riders behind them not being able to stop before running over them. While all the different disciplines of mountain biking has their dangers, downhill, trials and dirt jump invite the most potential for mountain bike crashes.

With the number of riders on trails today along with the proliferation of extreme sport riding, it is no longer a matter of if a rider will be involved in mountain bike crashes, rather it is a matter of when. Regardless of the experience or expertise of the rider, a crash can be caused by another careless or inexperienced rider. Due to the potential consequences of inevitable mountain bike crashes, riders are advised to take advantage of the many safety accessories available.

One of the first body parts to hit ground in mountain bike crashes are the hands, with fingers and wrists often suffering the most from even the slightest accidents. Mountain bikes gloves, available in full-finger or half-finger designs can ease the pain on the hands from a death-grip on the handlebars. However, full-finger gloves can help keep the skin where it belongs in event of an accident.

The primary piece of safety equipment is a helmet and in many mountain bike crashes where riders were using this protection, other bones may have been broken but their heads stayed in one piece. A good quality helmet can do more in preventing serious, often life-threatening injuries than any other piece of safety equipment. Serious head injuries can be prevented with a helmet and today’s styles and designs make them more comfortable to wear.

Anti-skid clothing can also help a fallen rider maintain their skin, or at least reduce the burn marks often associated with mountain bike crashes. Comfortably padded shorts and shirts absorb a lot of the skid burns from falling at higher speeds. Eye protection is also important as debris as well as the wind can cause the eyes to tear, blurring the vision that can lead to mountain bike crashes when the rider fails to negotiate a curve or other obstruction.

Read more...
Related Posts Plugin for WordPress, Blogger...

  © Blogger template PingooIgloo by Ourblogtemplates.com 2009

Back to TOP